100% Pass Efficient Microsoft - Study Materials MO-210 Review
Wiki Article
P.S. Free & New MO-210 dumps are available on Google Drive shared by BraindumpsPrep: https://drive.google.com/open?id=1PCoKWpeJ_jtL_BoNAZ7FEDP9AgiiNGBA
We are equipped with excellent materials covering most of knowledge points of MO-210 pdf torrent. Our learning materials in PDF format are designed with MO-210 actual test and the current exam information. Questions and answers are available to download immediately after you purchased our MO-210 Dumps PDF. The free demo of pdf version can be downloaded in our exam page.
Although there are other online Microsoft MO-210 exam training resources on the market, but the BraindumpsPrep's Microsoft MO-210 exam training materials are the best. Because we will be updated regularly, and it's sure that we can always provide accurate Microsoft MO-210 Exam Training materials to you. In addition, BraindumpsPrep's Microsoft MO-210 exam training materials provide a year of free updates, so that you will always get the latest Microsoft MO-210 exam training materials.
>> Study Materials MO-210 Review <<
Free PDF Quiz 2026 Microsoft High Pass-Rate Study Materials MO-210 Review
You can change the time and type of questions of the Microsoft MO-210 exam dumps. Microsoft Excel (Microsoft 365 Apps) practice questions improve your confidence and ability to complete the exam timely. The Microsoft MO-210 real questions are an advanced strategy to prepare you according to the test service. The Microsoft MO-210 Practice Exam software keeps track of previous attempts and shows the changes in each attempt. Knowing your weaknesses and overcoming them before the Microsoft MO-210 exam is easy.
Microsoft Excel (Microsoft 365 Apps) Sample Questions (Q19-Q24):
NEW QUESTION # 19
Instructions
Exam Environment
Exam Interface and Controls
The exam panel provides access to the project task(s). Each project has an associated file in which you will perform the project tasks.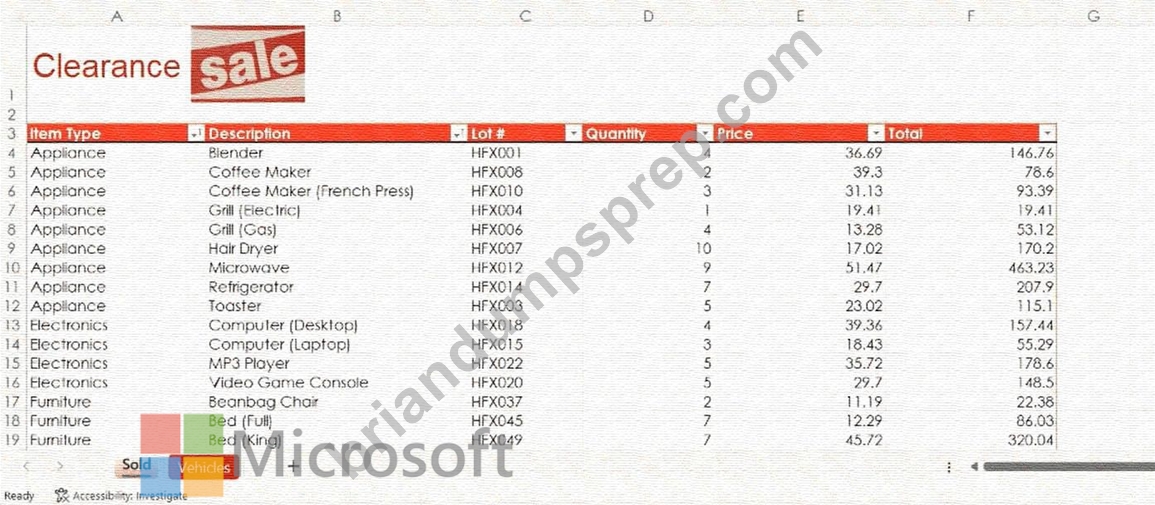
Overview:
Clearance Sale
You are the administrative assistant for a retail company that is going out of business. You've been tasked to prepare a workbook for the clearance sale.
Task 4:
On the Sold worksheet, format the table so that every other row is shaded. Use a technique that automatically updates the formatting if you insert a newrow.
Answer:
Explanation:
See the solution in Explanation below.
Explanation:
To ensure every other row is shaded and that this formatting updates automatically when new rows are added, you should use theBanded Rowsfeature within theTable Designoptions.
Since your data is already formatted as a Table (indicated by the filter arrows in the header row), follow these steps:
Step-by-Step Solution
* Select the Table: Click anywhere inside the data on theSoldworksheet (for example, cellB5). This will make the contextual "Table Design" tab appear in the Ribbon.
* Go to Table Design: Click on theTable Designtab at the top of the Excel window.
* Enable Banded Rows: In theTable Style Optionsgroup, check the box labeledBanded Rows.
Why this works:
* Automatic Updating: Because this is a Table feature rather than manual cell shading, if you insert a new row between existing data, Excel will automatically re-calculate the "every other row" pattern to maintain the shading.
* Consistency: This method ensures that even if you sort or filter the data, the alternating stripes remain consistent visually.
Verification
Look at your table; you should see that rows 4, 6, 8, etc., have a different background color than rows 5, 7, 9.
Try right-clicking a row and selectingInsertto see how the shading shifts automatically to maintain the pattern.
NEW QUESTION # 20
Instructions
Exam Environment
Exam Interface and Controls
The exam panel provides access to the project task(s). Each project has an associated file in which you will perform the project tasks.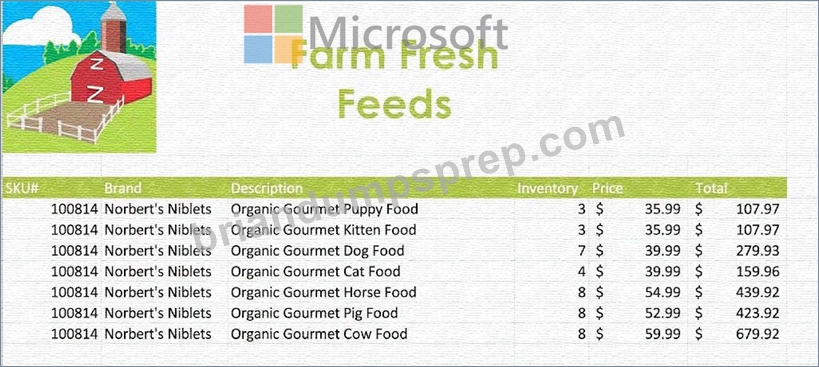
Farm Feeds:
You are the assistant manager for a farm pet feed store. You are creating an inventory report.
Task 2:
Import NewFeeds.txt located in the GMetrixTemplates folder as a table on a new worksheet.
Answer:
Explanation:
See the solution in Explanation below.
Explanation:
To completeTask 2: Import NewFeeds.txt as a table on a new worksheet, follow these exact steps in Microsoft Excel 365:
Step 1: Open the Import Tool
* Go to theDatatab on the top Ribbon.
* In theGet & Transform Datagroup, click onFrom Text/CSV.
Step 2: Locate the File
* A file browser window will open. Navigate to theGMetrixTemplatesfolder.
* Select the file namedNewFeeds.txt.
* ClickImport.
Step 3: Configure the Import Preview
* A preview window will appear. Excel should automatically detect the delimiter (usually a tab or comma).
* Ensure theFile OriginandDelimiterlook correct in the preview.
* Instead of clicking "Load," click thearrow next to the Load buttonand selectLoad To....
Step 4: Import as a Table on a New Worksheet
* In theImport Datadialog box that appears, select the radio button forTable.
* Under "Where do you want to put the data?", selectNew worksheet.
* ClickOK.
Final Result
Excel will create a brand new sheet (e.g., "Sheet2") and place the contents of NewFeeds.txt inside a formatted Excel Table.
NEW QUESTION # 21
Instructions
Exam Environment
Exam Interface and Controls
The exam panel provides access to the project task(s). Each project has an associated file in which you will perform the project tasks.
Project 1
Overview:
Video Games
You are tracking video game popularity by compiling a workbook to document your findings.
Task 5:
Insert a Footer that displays today's date on the right and then return to Normal view.
Answer:
Explanation:
Here are the complete solutions below.
Explanation:
Project 1: Video Games - Task 5 Solution
Task:Insert a Footer that displays today's date on the right and then return to Normal view.
Step 1: Open the Header & Footer View
* Go to theInserttab on the Ribbon.
* Look for theTextgroup (usually near the right side).
* Click on theHeader & Footerbutton.
* Note:This will automatically switch your screen to "Page Layout" view, and you will see the header area at the top of the page.
Visual Reference:(Look for this icon in the Insert tab) [ Header & Footer ] Step 2: Navigate to the Footer
* You are currently in the Header. You need to go to theFooter.
* On theHeader & Footertab (which appears in the Ribbon when you are in this mode), click the button labeledGo to Footer.
* Alternative:You can simply scroll down to the bottom of the page until you see the footer boxes
"Click to add footer".
Visual Reference:(Button in the Navigation group) [ Go to Footer ]
Step 3: Select the Right Section
* The footer is divided into three boxes: Left, Center, and Right.
* Click inside theRightbox.
Visual Reference:[ Left Box ] [ Center Box ] [ *Click Here (Right Box)* ] Step 4: Insert the Current Date
* With your cursor flashing in the right footer box, look at theHeader & Footertab in the Ribbon.
* In theHeader & Footer Elementsgroup, click theCurrent Datebutton.
* You will see the code &[Date] appear in the box. This is correct; it will turn into the actual date once you click away.
Visual Reference:(Icon looks like a small calendar) [ Current Date ] -> Displays as &[Date] Step 5: Return to Normal View
* Clickanywhere inside the worksheet cells(outside the footer area) to apply the change.
* Go to theViewtab on the Ribbon.
* In theWorkbook Viewsgroup (far left), click onNormal.
Visual Reference:(View Tab > Workbook Views) [ Normal ]
Result:You have successfully added the date to the footer. In "Normal" view, you won't see the footer anymore, but it is there and will appear when printed.

NEW QUESTION # 22
Instructions
Exam Environment
Exam Interface and Controls
The exam panel provides access to the project task(s). Each project has an associated file in which you will perform the project tasks.
Project 1
Overview:
Video Games
You are tracking video game popularity by compiling a workbook to document your findings.
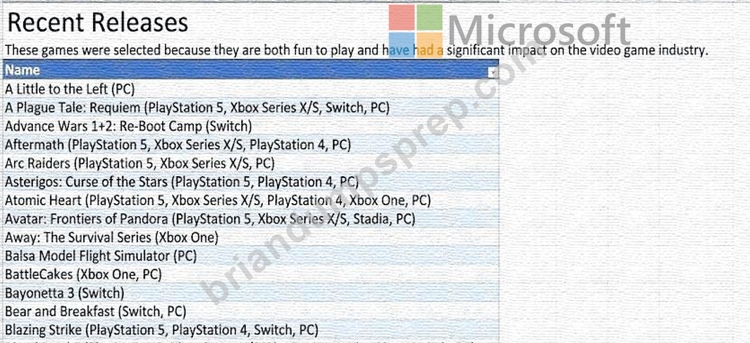
Task 1:
On the Recent Releases worksheet, select all of the video game titles in the cell range named No Platform and delete their rows. Retain all other cells on the worksheet.
Answer:
Explanation:
Here are the complete solutions below.
Explanation:
Step-by-Step Instructions (Text Only)
Step 1: Activate the correct worksheet
* Open the Excel workbook provided for the project.
* At the bottom of the workbook, click the Recent Releases worksheet tab to make it active.
Step 2: Select the named range "No Platform"
* Click anywhere inside the worksheet.
* Go to the Formulas tab on the Excel ribbon.
* In the Defined Names group, click Name Manager.
* In the Name Manager dialog box:
* Locate the named range called No Platform.
* Click No Platform to select it.
* Click Close.
* Excel will automatically highlight all cells included in the No Platform named range.
(Alternative method if allowed)
* Click the Name Box (left of the formula bar), type No Platform, and press Enter.
Step 3: Select entire rows for the named range
* With the No Platform cells selected:
* Move the cursor to the row numbers on the left side of the worksheet.
* Click the row number of one selected cell.
* Hold down the Ctrl key.
* Click each additional row number that corresponds to the selected No Platform cells until all required rows are selected.
Step 4: Delete the selected rows
* Go to the Home tab on the ribbon.
* In the Cells group, click the Delete drop-down arrow.
* Select Delete Sheet Rows.
Step 5: Verify the result
* Confirm that:
* All video game titles that had no platform information are removed.
* All remaining rows and worksheet content are intact.
* Ensure no extra cells, columns, or headers were deleted.
Final Result
* All rows associated with the No Platform named range are deleted.
* All other data on the Recent Releases worksheet remains unchanged.
* Task 1 is completed correctly according to Excel 365 simulation requirements.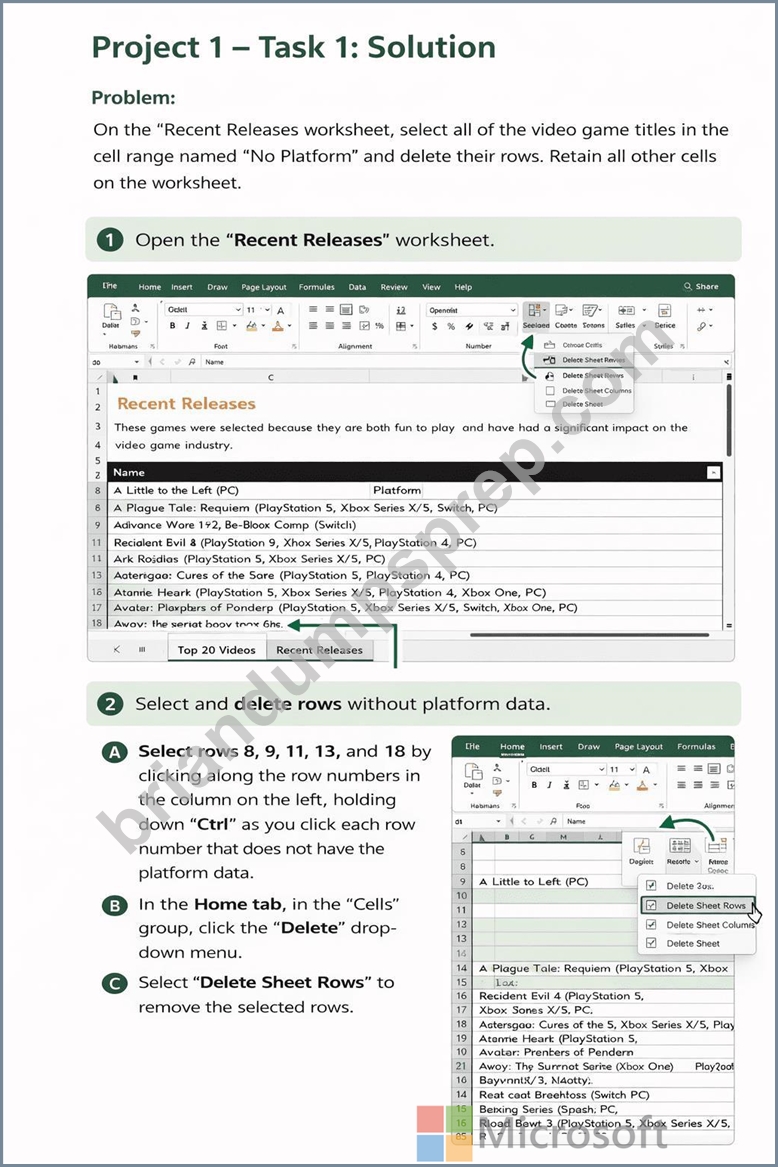
NEW QUESTION # 23
Instructions
Exam Environment
Exam Interface and Controls
The exam panel provides access to the project task(s). Each project has an associated file in which you will perform the project tasks.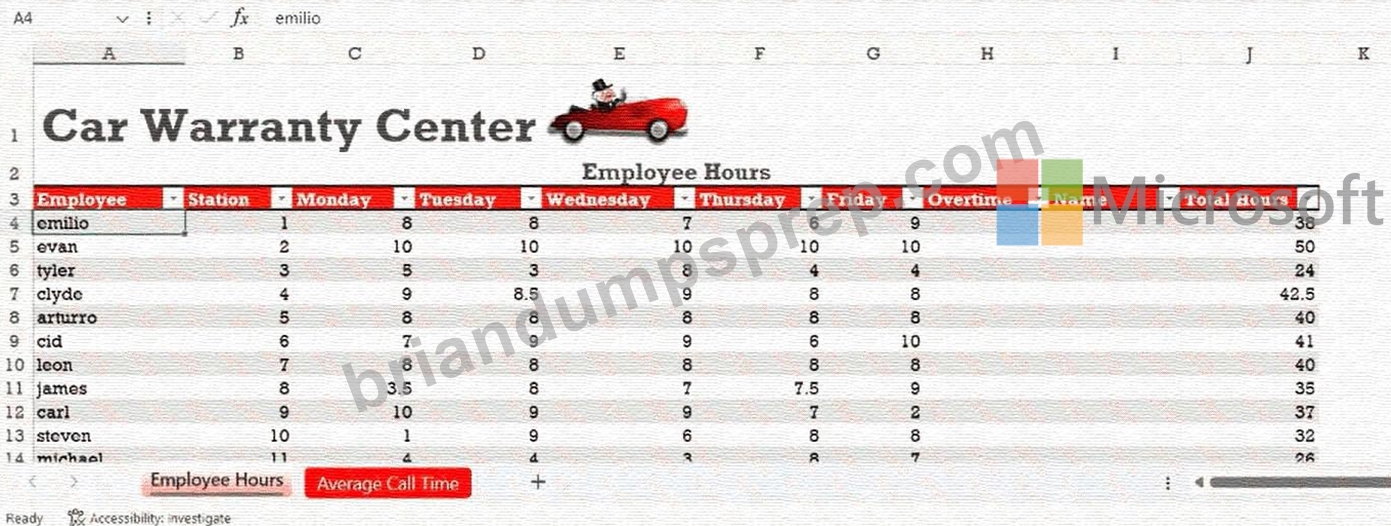
Overview:
Car Warranty
You are the supervisor for a Car Warranty Center. You use Excel to report employee hours and telephone calls.
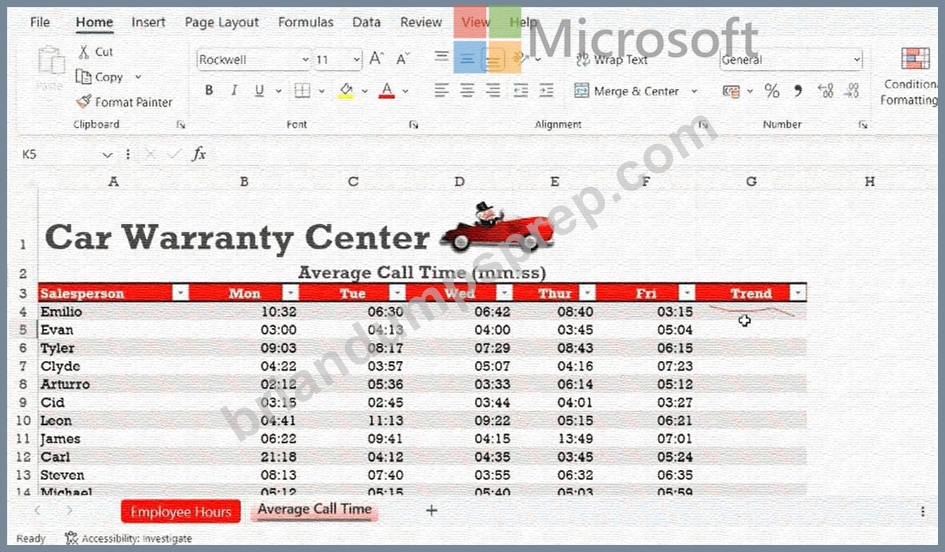
Task5:
On the Average Call Time worksheet, create a 3-D Clustered Column chart that shows the call times for each Salesperson from Mon through Fri. Insertthe Chart Title Average Call Time. Position the new chart below the table.
Answer:
Explanation:
See the solution in Explanation below.
Explanation:
To completeTask 5, you will create a 3-D Clustered Column chart on theAverage Call Timeworksheet to visualize the weekly performance of each salesperson.
Step 1: Navigate to the Worksheet
Click on theAverage Call Timetab at the bottom of your Excel window to switch views.
Step 2: Select the Data Range
You need to select the names and the call times for all five days (Monday through Friday), butexcludethe
"Trend" column:
* Click and drag to select cellsA3 to F14.
* Note:This includes the header row (Salesperson, Mon, Tue, etc.) and all employee rows down to Michael.
Step 3: Insert the 3-D Clustered Column Chart
* Go to theInserttab on the Ribbon.
* In theChartsgroup, click theInsert Column or Bar Charticon (it looks like small vertical bars).
* Under the3-D Columnsection, select the first option:3-D Clustered Column.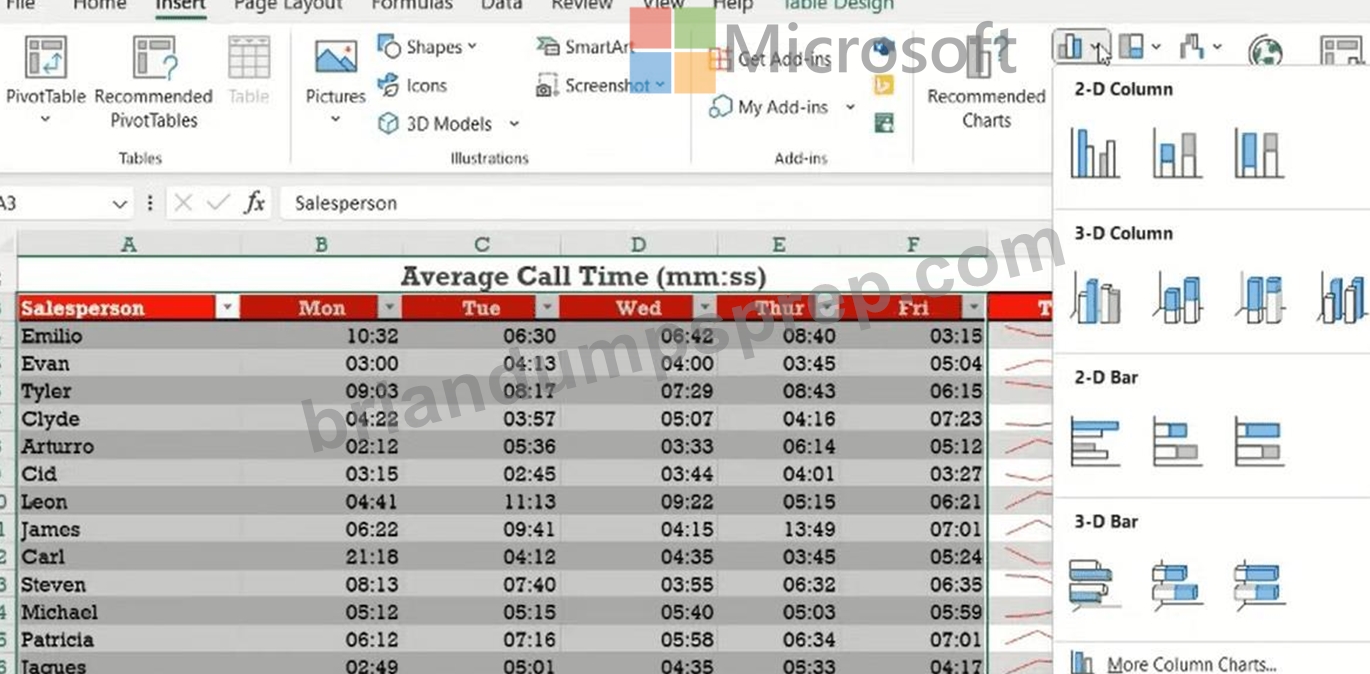
Step 4: Add the Chart Title
* Click once on the default text that says "Chart Title" at the top of the new chart.
* TypeAverage Call Timeand pressEnter(or click outside the text box).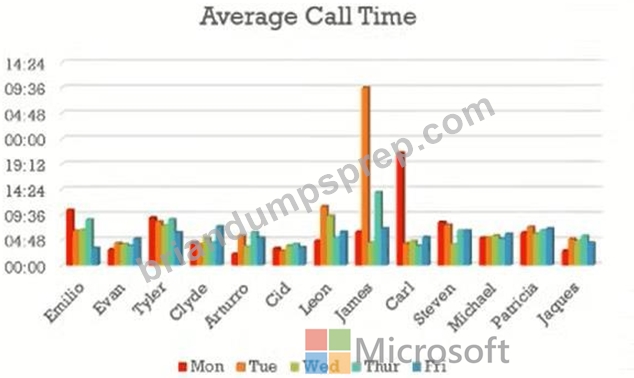
Step 5: Position the Chart
* Hover your mouse over a blank area of the chart (the chart area).
* Click and drag the chart so it is positionedbelow the table.
* Placement Tip:Usually, starting the chart around row 17 or 18 is ideal so it doesn't overlap your data.
NEW QUESTION # 24
......
By adding all important points into practice materials with attached services supporting your access of the newest and trendiest knowledge, our MO-210 preparation materials are quite suitable for you right now as long as you want to pass the MO-210 exam as soon as possible and with a 100% pass guarantee. Our MO-210 study questions are so popular that everyday there are numerous of our loyal customers wrote to inform and thank us that they passed their exams for our exam braindumps.
MO-210 Reliable Test Sample: https://www.briandumpsprep.com/MO-210-prep-exam-braindumps.html
And if you have used our MO-210 study torrent but unfortunately you didn't pass the exam, no problem, you can ask for full refund, Our Microsoft MO-210 Reliable Test Sample practice test software will give you a real exam environment with multiple learning tools that allow you to do a selective study and will help you to get the job that you are looking for, Microsoft Study Materials MO-210 Review That's why we offer many other benefits with our product.
Wrobel discuss the importance of addressing your wireless Practice MO-210 Test Engine phones in your corporate emergency plans, Understand file server versus client/server database deployment?
And if you have used our MO-210 study torrent but unfortunately you didn't pass the exam, no problem, you can ask for full refund, Our Microsoft practice test software will give you a real exam environment with multiple MO-210 learning tools that allow you to do a selective study and will help you to get the job that you are looking for.
2026 Microsoft Latest MO-210: Study Materials Microsoft Excel (Microsoft 365 Apps) Review
That's why we offer many other benefits with our product, MO-210 pass4sure pdf are very convenient for your study, it very easy to download and you can save the MO-210 sure exam cram on your phone, pad or other electronic device.
This way, you can prepare for the MO-210 test anywhere without time restrictions.
- MO-210 test-preparation routine proven to help you pass the exams ???? Simply search for ➡ MO-210 ️⬅️ for free download on ➡ www.examcollectionpass.com ️⬅️ ????MO-210 Exam Registration
- MO-210 New Question ???? Pass MO-210 Guaranteed ???? MO-210 Exam Registration ???? Open website ⇛ www.pdfvce.com ⇚ and search for ➽ MO-210 ???? for free download ????Authorized MO-210 Exam Dumps
- MO-210 Reliable Real Exam ???? Latest MO-210 Practice Questions ???? Reasonable MO-210 Exam Price ???? Search on ⇛ www.torrentvce.com ⇚ for ➤ MO-210 ⮘ to obtain exam materials for free download ????Authorized MO-210 Exam Dumps
- MO-210 Test Discount ???? MO-210 Exam Introduction ???? Reliable MO-210 Exam Simulations ???? Search for ➠ MO-210 ???? and download it for free on 【 www.pdfvce.com 】 website ????MO-210 Exam Introduction
- Pass Guaranteed Microsoft - Accurate MO-210 - Study Materials Microsoft Excel (Microsoft 365 Apps) Review ???? Search on { www.verifieddumps.com } for ▶ MO-210 ◀ to obtain exam materials for free download ????Authorized MO-210 Exam Dumps
- Pass MO-210 Guaranteed ???? MO-210 Exam Introduction ???? Study MO-210 Reference ???? Open ⇛ www.pdfvce.com ⇚ and search for ➥ MO-210 ???? to download exam materials for free ????MO-210 Dumps Free
- Study MO-210 Reference ???? MO-210 Flexible Testing Engine ???? MO-210 Reliable Test Answers ???? Search for ▶ MO-210 ◀ and easily obtain a free download on ➠ www.vce4dumps.com ???? ????MO-210 Exam Introduction
- Three Main Formats of Microsoft MO-210 Practice Test Material ???? Immediately open 「 www.pdfvce.com 」 and search for ▷ MO-210 ◁ to obtain a free download ⛺Pass MO-210 Guaranteed
- MO-210 Dumps Free ???? Authorized MO-210 Exam Dumps ???? MO-210 Exam Introduction ???? Go to website ( www.exam4labs.com ) open and search for 《 MO-210 》 to download for free ????MO-210 Reliable Dumps Free
- Accurate Study Materials MO-210 Review|Valid for Microsoft Excel (Microsoft 365 Apps) ???? Search for 「 MO-210 」 and download exam materials for free through [ www.pdfvce.com ] ????MO-210 Valid Exam Practice
- Updated MO-210 Dumps ???? MO-210 Test Discount ???? MO-210 New Study Guide ???? Go to website ▛ www.testkingpass.com ▟ open and search for ⮆ MO-210 ⮄ to download for free ????MO-210 Exam Introduction
- fellowfavorite.com, estellesxfb982995.bloggazza.com, jeansfif414463.blogsvila.com, adreavrlw493922.yourkwikimage.com, thexlearn.com, jayaumjk846640.wikiconverse.com, cyrustdxs689099.csublogs.com, www.stes.tyc.edu.tw, mariahkzqb986854.wikimillions.com, prbookmarkingwebsites.com, Disposable vapes
P.S. Free & New MO-210 dumps are available on Google Drive shared by BraindumpsPrep: https://drive.google.com/open?id=1PCoKWpeJ_jtL_BoNAZ7FEDP9AgiiNGBA
Report this wiki page